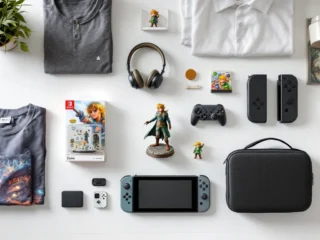
Your My Nintendo Account is the central hub for everything Nintendo. It’s where your game libraries live, where you earn rewards, where your save data syncs, and where you manage security across all your devices. Whether you’re diving into Zelda on the Switch, claiming free eShop vouchers, or protecting your account from unauthorized access, it all flows through this one account.
Setting it up properly from day one saves you headaches down the road, and knowing how to manage it keeps your gaming experience seamless across your console, handheld, and mobile devices. This guide walks you through everything: account creation, linking your console, earning rewards, locking down security, and solving common problems that might pop up along the way.
Key Takeaways
- A My Nintendo Account is essential for accessing your digital game library, cloud saves, online multiplayer, and earning rewards points across all Nintendo Switch devices.
- Enable Two-Factor Authentication immediately in your account security settings to protect against unauthorized access and prevent hackers from stealing your password and digital games.
- Use a credit card instead of debit for eShop purchases, and create a secure password manager to store unique passwords that are at least 12 characters long.
- Designate one console as your Primary Console to enable game sharing with family members, allowing everyone on that device to play your digital library.
- Gold Points earned from eShop purchases can be hoarded and redeemed for free vouchers or discounts, effectively reducing the cost of future game launches by up to 10-20%.
- Cloud save backups sync automatically between your Switch and Switch OLED or Switch Lite, so you can seamlessly continue your progress across multiple consoles.
What Is A My Nintendo Account And Why You Need One
A My Nintendo Account is your personal profile with Nintendo that unifies your gaming ecosystem. It’s the account you use to sign in on your Switch, Switch OLED, or Switch Lite, but it goes way beyond just logging in.
Here’s what your My Nintendo Account actually does:
- Stores your digital library: Any game you purchase on the eShop is tied to your account. You can redownload it on any console where you’re signed in as that account.
- Syncs save data: Your progress in The Legend of Zelda: Breath of the Wild, Super Smash Bros. Ultimate, or any other game backs up to the cloud. You won’t lose 20 hours of progress if your console dies.
- Tracks achievement and play time: Your playtime stats and achievement progress are logged across all your devices.
- Unlocks online multiplayer: Nintendo Switch Online (NSO) is tied to your account. Without it, most online features are locked off.
- Enables cloud saves and cloud play: NSO+ subscribers get cloud backup for compatible games and access to classic NES/SNES titles through Expansion Pack.
- Manages payments and purchase history: Your eShop balance, credit cards, and every game you’ve bought live in your account settings.
- Grants rewards points: My Nintendo Rewards lets you earn points from purchases and challenges, then redeem them for free games, discounts, or in-game items.
Without a My Nintendo Account, you can’t access any of this. You’d be stuck playing local, single-player games with no online functionality and no way to recover your data if something goes wrong. For competitive or social gamers, that’s essentially unplayable.
How To Create Your My Nintendo Account
Requirements Before You Start
Before you jump into account creation, have these things ready:
- A valid email address: This is your login and recovery method. Use an email you actually check.
- Your date of birth: Nintendo requires this for legal compliance and age verification.
- A strong password: Make it at least 8 characters, mix uppercase/lowercase, numbers, and symbols. Don’t reuse passwords from other accounts.
- A username: This is what other players see online. Pick something you won’t regret, because Nintendo makes it hard to change later.
- An internet connection: Obviously. Wi-Fi or wired, either works.
If you’re setting up on a console, you’ll also need the console itself powered on and ready.
Step-By-Step Account Creation Process
You can create a My Nintendo Account in two ways: directly on the Nintendo website or during console setup. The website method is faster if you’ve already got a console.
Method 1: Via Nintendo.com (Fastest)
- Go to Nintendo’s account creation page and click “Create an Account”.
- Enter your email address. Nintendo will send a verification link, check your inbox and click it.
- Set your password (8+ characters, mix it up). Write it down in a secure password manager, not a sticky note.
- Enter your date of birth and country of residence.
- Create your username. This displays online, so keep it appropriate. You can’t change it later, so think it through.
- Agree to the terms and conditions (yes, nobody reads them, but Nintendo’s actual terms are pretty standard).
- Verify your email one more time. You’re now done.
Once your account is created, sign into the Nintendo website with your credentials. Navigate to Account Settings > Profile to add your profile picture, bio, and other optional details.
Method 2: During Console Setup
If you’re opening a brand-new Switch or Switch OLED:
- Power on the console and follow the initial setup prompts.
- When asked to connect a user account, select “Create New User”.
- Choose “Create a New Account” (don’t link to an existing one yet, you’re building from scratch).
- Select “Create an Account Using an Email Address”.
- Enter your email, password, date of birth, and username as above.
- Confirm the verification email.
- Return to your console and complete the setup.
Both methods take about 5 minutes. You’re not locked into either, you can create a web account and link it to your console later, or vice versa.
Pro tip: If you’ve already got a Nintendo Account from the Wii U or 3DS era, you can use that same account on Switch. You don’t need to create a new one. Just sign in with your existing email and password during setup.
Setting Up Your Nintendo Network ID
Here’s where terminology gets a little confusing: your My Nintendo Account (what you just created) is different from your Nintendo Network ID. They’re two separate systems that serve different purposes.
Your My Nintendo Account is your primary login, it’s what you use now on Switch. Your Nintendo Network ID is the older system from the Wii U and 3DS era. If you’re a legacy player with an NNID, linking them together gives you access to your old content and keeps your account history intact. If you’re brand-new to Nintendo, you technically don’t need an NNID, but linking one is still useful for digital purchases from older systems.
Linking Your Network ID To Your Console
If you already have a Nintendo Network ID (from Wii U or 3DS):
- On your Switch, go to System Settings > Users and Accounts > Accounts.
- Select your account and click “Link Nintendo Network ID”.
- Enter your NNID email and password when prompted.
- Confirm the linking request.
Your Switch will now recognize your NNID history, and any digital games you owned on Wii U or 3DS become available in your account settings (though you’ll need to own the Switch versions of those games to play them).
If you don’t have an NNID and don’t need one: Skip this step. Your My Nintendo Account is enough.
Managing Multiple User Profiles
One of Nintendo’s smart features: a single console can have multiple user profiles, but each profile needs its own My Nintendo Account (or can remain local-only if offline play is fine).
Here’s the breakdown:
On a single Switch:
- Profile 1 (your main account): Has your My Nintendo Account linked, owns games digitally, handles NSO subscription.
- Profile 2 (family member or friend): Can be a local-only profile OR linked to their own My Nintendo Account.
- Profile 3+: Same deal, local or cloud-linked.
Digital game sharing: If Profile 1 buys a game, any other profile on that console can play it. This is key for families or households with multiple gamers.
Online play: Only profiles linked to an active Nintendo Switch Online subscription can play online. If Profile 1 has NSO, other profiles on that console inherit the subscription (Family Plan users need a family group set up).
To add a new user:
- Go to System Settings > Users and Accounts > Manage Users.
- Click “Add User”.
- Either create a new account right there or select an existing account to link.
- Set parental controls if needed (useful for younger players).
Each profile keeps its own play time, achievement data, and friend list separate, even if they’re using the same console and the same game library.
Mastering My Nintendo Rewards And Points
My Nintendo Rewards is Nintendo’s points-based loyalty program. You earn points from purchases and challenges, then spend them on free games, eShop discounts, or in-game items. The system is straightforward, but there are optimization strategies if you want to maximize your returns.
How To Earn And Redeem Gold Points
Gold Points are earned whenever you buy something on the eShop or purchase a digital Switch game. The earn rate is: 5% of your purchase value in Gold Points. Drop $20 on a game, you get 100 Gold Points.
Where you earn Gold Points:
- Digital games on the eShop
- eShop credit purchases
- DLC (Splatoon 3 cosmetics, Mario Kart 8 tracks, etc.)
- Nintendo Switch Online subscriptions (yes, you earn points even on NSO)
You do NOT earn points on:
- Physical game cartridges
- Nintendo Switch console hardware
- Pre-orders (you earn when the game releases and you’re charged)
To check your Gold Point balance:
- Go to Nintendo eShop on your console.
- Select your profile icon in the top-right corner.
- Look for “Gold Points” in the menu. You’ll see your current balance.
Redeeming Gold Points:
- Go to My Nintendo (on your console or online at accounts.nintendo.com).
- Navigate to My Nintendo Rewards.
- Browse available rewards. They rotate seasonally.
- Select an item and click “Spend Points”.
- Your eShop account gets credited immediately with a discount code or free game unlock.
What can you redeem?
- Free eShop vouchers: $5, $10, or $20 credit (most common, best value).
- Game discounts: 10-30% off specific titles (often weaker value than vouchers).
- In-game items: Mario Kart 8 Deluxe cosmetics, Splatoon 3 gear, Fire Emblem: Three Houses DLC, etc.
- Game demo codes: Free access to limited-time demo versions.
Strategy: Gold Points never expire as long as your account is active. Hoard them for big releases. When a $60 game launches, you can burn 500 points for a $5 discount, bringing your effective cost down to $55. Stack multiple vouchers, and you’re looking at real savings on an annual library of games.
Platinum Points And Exclusive Benefits
Platinum Points are separate from Gold Points. You earn them by completing challenges on the My Nintendo website or app, things like “Click this banner” or “Answer this poll about your favorite Nintendo franchise.” They’re basically gamification for engagement.
Platinum Points are worth way less than Gold Points (roughly 1 Platinum Point ≈ 1 cent in redemption value), but they’re free money if you’re logging into My Nintendo anyway.
What you can get with Platinum Points:
- Small eShop discounts (usually 2-5% off)
- Exclusive cosmetics (limited-edition Mario or Zelda profile picture frames)
- Early access to sales or new reward offers
- In-game currency for free-to-play titles like Pokémon Unite or Mario Kart Live
Bonus perks tied to My Nintendo membership:
- Free eShop coupons: Every 3-4 months, Nintendo drops a coupon worth 10% off a single purchase (capped at $5-10 discount).
- Exclusive demos: Some games are only available as demos through My Nintendo rewards first.
- Birthday gifts: A free eShop credit on your birthday (usually $3-5).
These perks aren’t huge, but they stack. Over a year, a casual player might rack up $20-30 in free credit just from passive rewards. Competitive players who make regular eShop purchases could see double or triple that. The key is not overthinking it, just redeem when rewards match what you’re planning to buy anyway.
Securing Your Account With Advanced Settings
Nintendo accounts are attractive targets for hackers because they’re tied to payment information and digital libraries worth hundreds of dollars. A compromised account means someone else is playing your games, spending your eShop credit, or worse, locking you out entirely. Taking 10 minutes to lock down security now beats dealing with account recovery later.
Two-Factor Authentication And Password Management
Two-Factor Authentication (2FA) is the single most important security setting you can enable. Here’s why: Even if someone steals your password, they can’t access your account without your phone.
To enable 2FA:
- Go to Nintendo Account Settings on your web browser and sign in.
- Click Security in the left menu.
- Scroll to Two-Step Verification and click Edit.
- Choose your authenticator method:
- Authenticator app (recommended): Use Google Authenticator, Microsoft Authenticator, or Authy. Scan the QR code Nintendo provides, and your app will generate a 6-digit code every 30 seconds.
- Text message (SMS): Receive codes via text. Less secure than an app, but better than nothing.
- Generate backup codes and write them down in a safe place. If you lose access to your authenticator app, these codes let you recover your account.
- Test logging out and back in to confirm 2FA works.
Password management:
- Use a password manager like Bitwarden, 1Password, or Dashlane. Don’t store passwords in your browser or on paper.
- Make your Nintendo password at least 12 characters and unique (not reused on other sites).
- Change your password immediately if you suspect any breach on other platforms you use.
- Never share your password, even with friends or family. Use console account sharing instead (see the devices section below).
Recovery options:
Set up backup contact methods in case you lose access:
- Go to Account Settings > Security > Login ID & Password.
- Add a backup email address if you have one.
- Confirm your primary email is current and monitored.
If you ever get locked out, Nintendo can verify your identity and send reset links to these addresses.
Protecting Your Payment Information
Your Switch handles payment data through Nintendo’s encrypted servers, but you still need to be cautious about what you store on file.
Best practices:
- Use a credit card, not debit: Credit cards have fraud protection built in. If someone charges $500 to your card, your bank covers it. Debit cards don’t offer the same protection.
- Never save full card details: If you’re prompted to “save your card for future purchases,” decline. Instead, add an eShop gift card to your account and spend from that balance. This creates a firewall between your actual card and Nintendo’s system.
- Monitor your account: Check your purchase history monthly in Account Settings > Purchase History. Spot anything you didn’t buy?
- Set spending limits: If you have kids with Switch accounts on your console, use Parental Controls to cap how much they can spend per month.
- Revoke old payment methods: If you updated your credit card, remove the old card from Account Settings > Payment Methods so it can’t be used if your account is compromised.
One more security layer: Consider setting up a specific email address just for gaming accounts. This email isn’t tied to work or personal stuff, so if it gets breached, the damage is isolated. It sounds paranoid, but competitive players and anyone storing hundreds of dollars in digital games should think seriously about it.
Troubleshooting Common My Nintendo Account Issues
Eventually, something goes wrong. You’ll forget a password, a console won’t sync, or you’ll get locked out. Here are the most common problems and actual fixes, not generic Nintendo support responses.
Account Recovery And Forgotten Passwords
“I forgot my password and can’t log in.”
- On the Switch login screen, select your account and click “Forgot password?” (or go directly to accounts.nintendo.com and click “Forgot Password”).
- Enter your email address.
- Check your email for a password reset link. It’s valid for 24 hours.
- Click the link and set a new password (12+ characters, mixed case, numbers, symbols).
- Try logging in again on your console.
If you don’t receive the reset email:
- Check your spam/junk folder. Nintendo’s emails sometimes get filtered.
- Wait 15 minutes, sometimes there’s a delay.
- Use a different email if you set up a backup email in your account settings.
- If none of that works, contact Nintendo Support with proof of ownership (the email associated with your account, the console serial number, or the last 4 digits of a card you used).
“I forgot my email address associated with my account.”
This is trickier. You need to prove ownership:
- Contact Nintendo Support through their website.
- Provide your username, the console serial number, and any other identifying info.
- Nintendo will verify you own the account and send a recovery email.
- This process takes 24-48 hours, so don’t expect instant results.
“My account was hacked.”
- If you can still log in, change your password immediately and enable 2FA (if you haven’t already).
- Check Purchase History for unauthorized charges and report them to Nintendo.
- Review Connected Services (in Account Settings) and disconnect anything you don’t recognize.
- If you can’t log in, contact Nintendo Support immediately with proof of ownership. They can lock the account, investigate the breach, and help you recover access.
Console Linking And Sync Problems
“My console says my account is already linked to another console.”
Each My Nintendo Account can be the “primary account” on only one console. Here’s what that means:
- Primary Console: The account that owns games on that console can be used by any user on that console. This is game-sharing.
- Secondary Console: Only the account that owns the games can play them.
If you own a Switch and just bought a Switch OLED, you need to decide which is your primary console:
- On your Switch, go to System Settings > Users and Accounts > Users and Accounts Settings > Link User to Nintendo Account.
- Select your account.
- You’ll see an option to designate this console as primary or secondary.
- On one console, set it as Primary. On the other, set it as Secondary.
- Sign in with your account on the secondary console.
Now, your games work on both consoles, and save data syncs across them via cloud backup.
“My saves aren’t syncing between consoles.”
Cloud save backup is automatic but can lag. Try these fixes:
- Make sure both consoles are signed into the internet.
- Go to System Settings > Data Management > Save Data Cloud Backup on both consoles and confirm it’s enabled.
- Play a game for a few minutes on one console, then check if the progress appears on the other.
- If that doesn’t work, manually upload: Go to System Settings > Data Management > Save Data Cloud Backup > Upload to Cloud, select the game, and confirm.
- On the other console, go to the same menu and Download from Cloud.
“My console keeps saying ‘Connection Error’ when I try to sign in.”
This is usually a network issue, not an account issue:
- Restart your Switch (hold the power button for 10 seconds, select “Power Options” > “Restart”).
- Restart your Wi-Fi router (unplug for 30 seconds, plug back in).
- Test your connection: System Settings > Internet > Test Connection. You need at least 5 Mbps download for most features.
- If you’re on 2.4GHz Wi-Fi, try switching to 5GHz (if your router supports it). 5GHz has better range on newer devices.
- If others in your household are streaming 4K video, gaming online, or downloading large files, they’re eating your bandwidth. Pause those or use a wired connection (USB Ethernet adapter for Switch).
If all of that checks out and you still can’t connect, your internet provider might be having outages. Check their status page or restart your modem.
“I’m getting an error code when trying to sign in.”
Nintendo error codes are annoying because they’re cryptic. Here’s how to decode them:
- Error 2110-1123 (WiFi problem): Same fix as above, network connectivity issue.
- Error 2618-0002 (Invalid user account): Your account credentials are wrong or the account is locked. Double-check your email and password.
- Error 4639-6000 (Account-linked console issue): Usually a primary/secondary console conflict. Re-check which console is primary.
- Error 2813-0001 (Server maintenance): Nintendo’s servers are down for updates. Check Nintendo’s Status Page and wait an hour.
For other error codes, search the specific number on Nintendo’s Support Site or ask in the community at Nintendo Life where other players have definitely hit the same issue.
Optimizing Your Account For Gaming Across Devices
Modern gaming isn’t just about one console anymore. You’ve got a Switch, maybe a Switch OLED for home, a Switch Lite for on-the-go, and possibly mobile games too. Your My Nintendo Account can span all of it, but you need to set it up right to avoid friction.
Using Your Account On Nintendo Switch, Switch OLED, And Switch Lite
All three models run the same software and use the same My Nintendo Account. The differences are hardware (screen size, docking, battery life), not account functionality.
Optimal setup for multiple Switch models:
Scenario 1: You own a Switch and just got a Switch OLED (home console upgrade)
- Designate the Switch OLED as Primary Console.
- Keep the standard Switch as Secondary.
- Your digital library works on both: saves sync automatically.
- Tip: The OLED’s larger screen and better colors are worth it for games like Zelda or Xenoblade Chronicles. Reserve the standard Switch for quick handheld sessions.
Scenario 2: You own a Switch and a Switch Lite (handheld + docked)
- Designate the standard Switch (with dock) as Primary Console.
- Keep the Lite as Secondary.
- Play docked at home on the Switch: take the Lite anywhere for undocked gaming.
- Saves sync between both, so you can continue a game anywhere.
Scenario 3: You’re sharing one console with family
- Designate the shared console as Primary Console.
- Your account and family members’ accounts all link to it.
- Each account owns its own games, but everyone can play everyone’s digital library on that primary console.
- This is how families use one Switch across multiple players without buying the same game twice.
- Note: You’ll need a Nintendo Switch Online Family Plan ($50/year) for everyone to play online multiplayer.
Game transfers and archives:
If you’re moving to a new Switch OLED:
- Sign into your My Nintendo Account on the new console during setup.
- Go to eShop > Your Profile > Redownload and select any game you own.
- The game downloads automatically. Your saves appear in the cloud backup section.
- You don’t need to manually transfer anything.
If you’re done with your old Switch and selling it, remove your account from it:
- Go to System Settings > Users and Accounts > Unlink Nintendo Account.
- This deletes your account from that console but doesn’t delete save data (which is tied to your account, not the console).
- Your new console will pull those saves when you sign in.
Mobile Gaming And App Integration
Nintendo has mobile apps that integrate with your My Nintendo Account: Nintendo Switch Online App (for voice chat and raid coordination in games like Pokémon Sword/Shield), the eShop app (browser shopping), and first-party games like Pokémon Sleep and Mario Kart Tour.
Setting up the Switch Online app:
- Download from your phone’s app store (iOS or Android).
- Sign in with your My Nintendo Account email and password.
- Enable notifications so you don’t miss raid invites in Pokémon Scarlet/Violet.
- For voice chat: Launch the app while playing a compatible game on your Switch. The voice chat goes through your phone’s mic, not the Switch speaker.
Free-to-play Nintendo titles:
Games like Pokémon Unite, Mario Kart Tour, and Fire Emblem Heroes are available on mobile and link to your Nintendo Account for cloud progress and rewards. You can play on your phone and console and see the same character progression across both.
One warning: These games have in-app purchases. If kids are playing, lock down the app store purchases in your phone’s settings or restrict the app with parental controls.
Earning My Nintendo rewards through mobile:
Some mobile games reward you with My Nintendo points:
- Play a few matches in Pokémon Unite, earn a small amount of Platinum Points.
- Complete challenges in Fire Emblem Heroes, get eShop vouchers.
- These rewards are usually modest (5-50 points), but they stack if you’re playing anyway.
The integration is loose compared to console, but it’s there. If you’re grinding a mobile Pokémon or Fire Emblem title, you might as well claim the My Nintendo rewards too.
Conclusion
Your My Nintendo Account is the foundation of your gaming life on Nintendo hardware. Get it set up right, strong password, 2FA enabled, primary console designated, and you’ll never think about it again. It just works.
From there, the real strategy is knowing where your leverage is. Stack Gold Points when you’re making big eShop purchases. Keep your saves synced across multiple consoles so you never lose progress. Share games with family on a primary console to split costs. Lock down security so hackers can’t destroy months of playtime and hundreds of dollars in digital content.
Nintendo’s account system isn’t flashy or trendy, but it’s solid. Once you understand the mechanics, optimization becomes second nature. The guides and tutorials on IGN and How-To Geek can help with specific technical setups too if you hit snags.
Now stop reading and get back to gaming. Your Switch is waiting.